Creating Your First In-App Message
Follow this simple guide to create engaging messages that connect with your audience.
Quick Start
🎯 Before You Begin
-
📝 Prepare Your Content
- Write your message text
- Pick a background image (1200x800px works best)
- Decide what action you want users to take
- Choose who should see your message
-
📅 Plan Your Campaign
- Pick when your message should appear
- Set start and end dates
- Choose the right timezone
Step-by-Step Guide
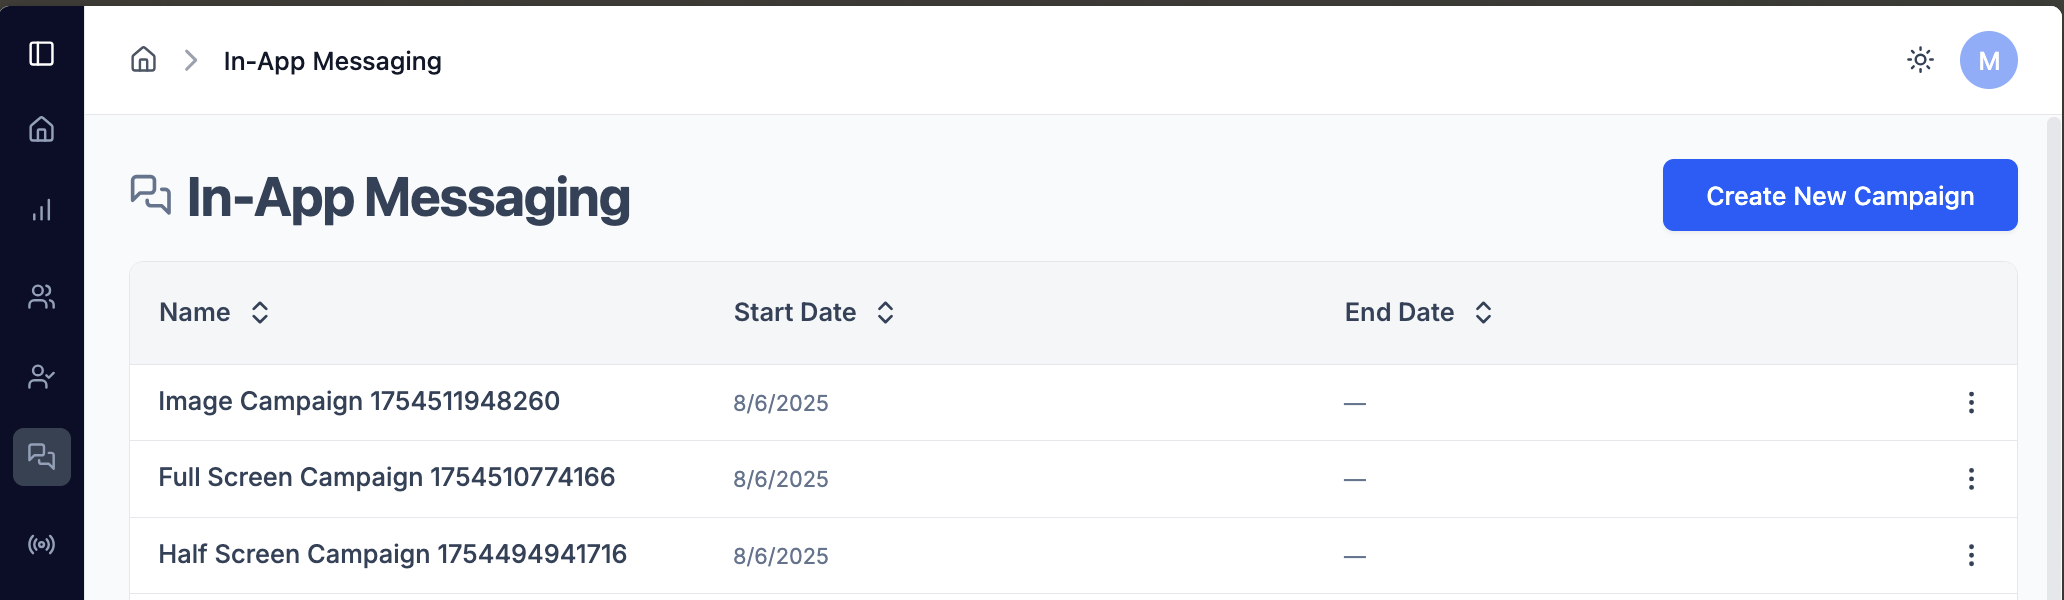
Step 1: 🚀 Open the In-App Messaging Tool
- Log into your Frontro dashboard
- In the left navigation, open Engagement, then In-App Messaging
- Click "New In-App Message" to get started
Step 2: 📝 Set Up Your Basic Details
Campaign Information
- 📋 Campaign Name: Give your message a name (like "Summer Sale 2025")
- 🌍 Start Timezone: Pick your audience's timezone
- ⏰ Start Date & Time: When should your message begin?
- 📅 End Date & Time: (Optional) When should it stop?
Message Content
- 📱 Size: Choose "Full Screen" or "Half Screen"
- 📋 Title: Write your headline (keep it under 50 characters)
- 📄 Description: Add your message text (supports formatting)
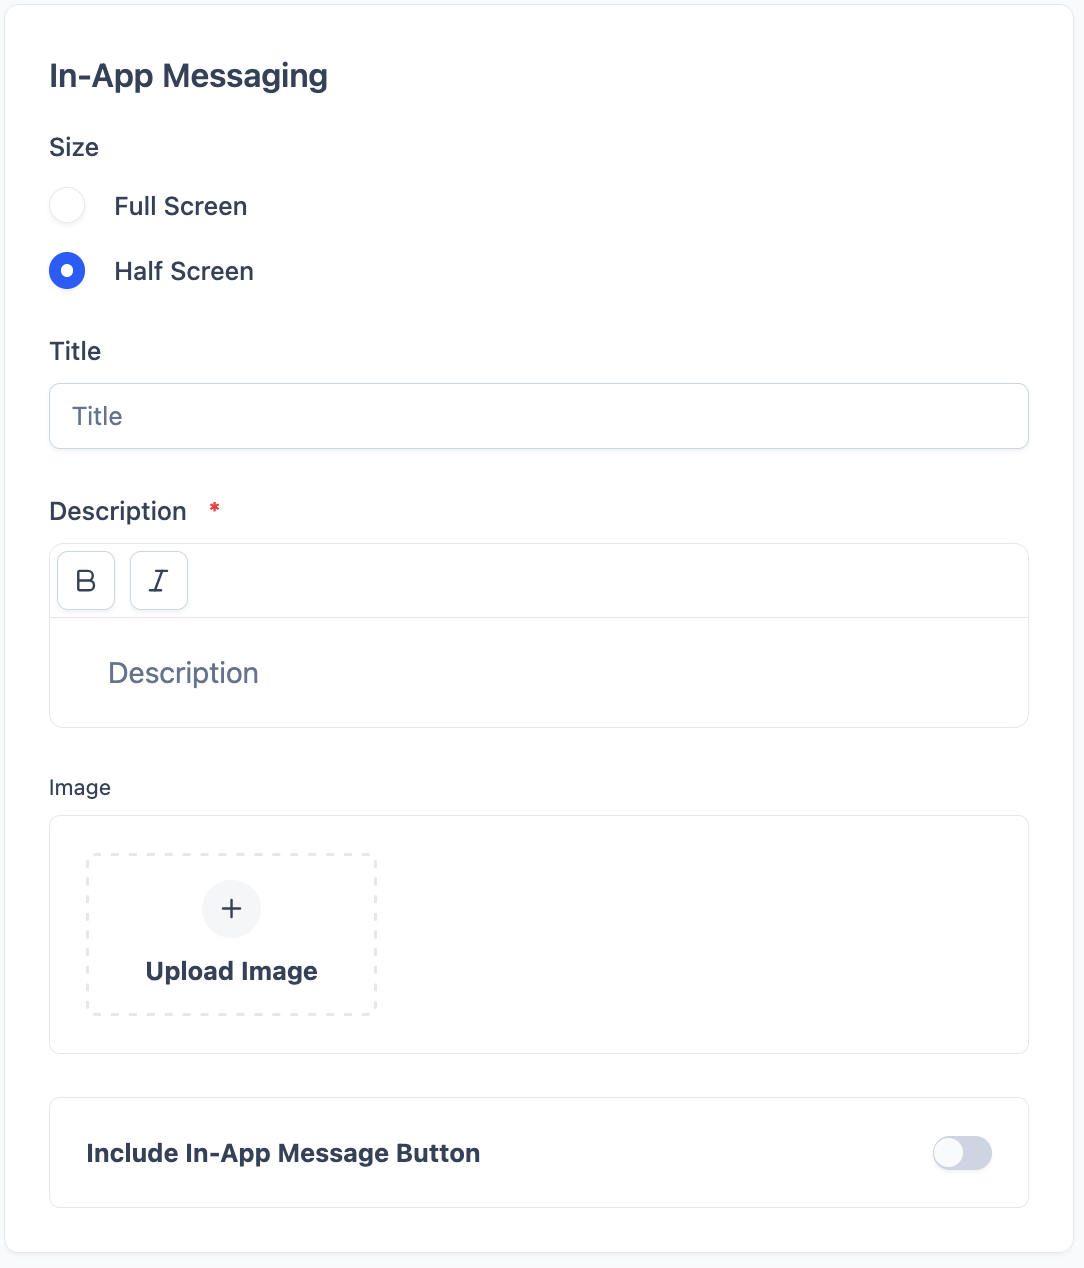
Step 3: 🖼️ Add Your Background Image
Upload Your Image
- Click "Upload Image" in the Image section
- Select your image (JPG, PNG, or WebP under 2MB)
- Preview the image to make sure it looks good
- Remove and re-upload if needed using the "X" button
💡 Image Tips:
- Use high-quality, relevant images
- Make sure text is readable over your image
- Test how it looks on different backgrounds
Step 4: 🔘 Set Up Your Action Buttons
Primary Button (Required)
- Turn ON the "Include In-App Message Button" toggle
- Button Text: Write your call-to-action (like "Get Started", "Learn More")
- Action URL: Add the link where users should go when they click
Secondary Button (Optional)
- Turn ON "Add Secondary Button" toggle
- Configure button text and action URL
- Use for alternative actions like "Maybe Later" or "Dismiss"
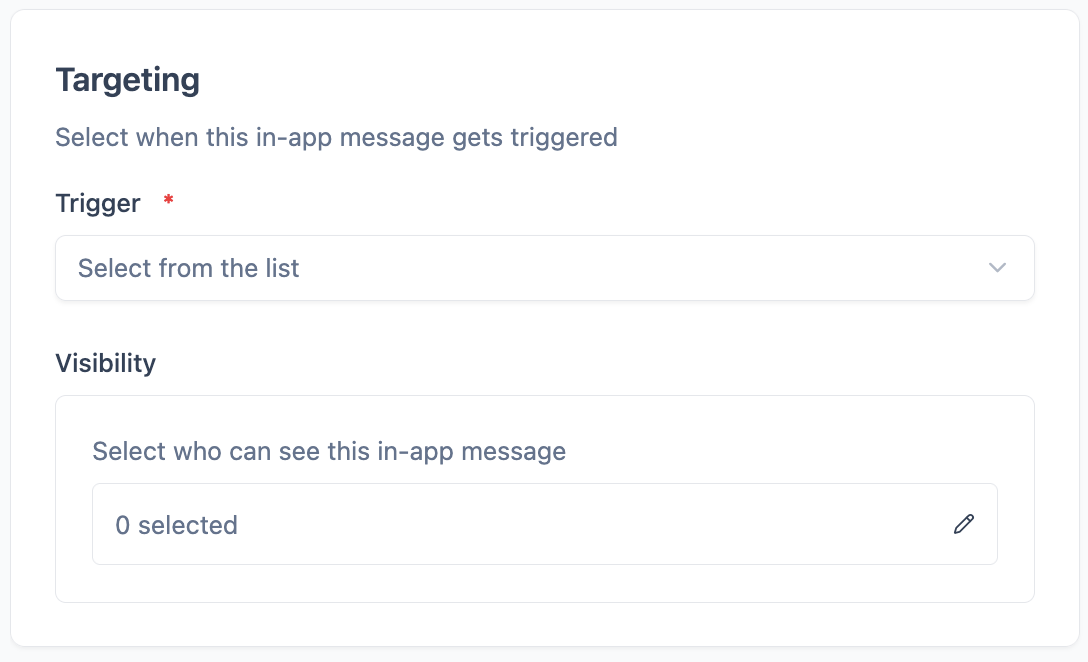
Step 5: 🎯 Choose Your Audience & Timing
Pick Your Trigger
- Click the "Trigger" dropdown (this is required)
- Choose when your message appears:
- 🌍 Everywhere: Shows on any page
- 🚀 App Launched: When someone opens your app
- 🧭 Navigating to Page: When users visit specific pages
- 🎬 Finished Watching: After someone finishes a video
Select Your Audience
- Click the "Visibility" field (shows "0 selected")
- Choose your target audience
- ⚠️ Important: You must pick an audience for your message to work!
- Check the preview to see how many people will see your message
Step 6: 👀 Preview Your Message
- Look at the mobile preview on the right side of the screen
- Check how your message looks on the simulated phone
- Verify everything looks good:
- ✅ Background image displays correctly
- ✅ Title and description text are readable
- ✅ Buttons are positioned properly
- ✅ Close button works
Configuration Details
📱 Message Size Options
Full Screen Messages
- Perfect for: Big announcements, welcoming new users, exclusive offers
- Content: Room for longer text and multiple elements
- Impact: Gets maximum attention (but more intrusive)
Half Screen Messages
- Perfect for: Regular promotions, feature announcements, gentle reminders
- Content: Limited space - keep text short and sweet
- Impact: Less disruptive, users can still see your app
📝 Content Writing Tips
Title Best Practices
- Keep it short (under 50 characters)
- Use action words like "Get", "Try", "Discover"
- Be specific about what users will get
- Avoid generic phrases like "Click Here"
Description Tips
- Use formatting to make text stand out
- Keep paragraphs short and easy to scan
- Include clear value - what's in it for users?
- Use bullet points for multiple benefits
🔘 Button Configuration
- Primary Button: Your main call-to-action
- Secondary Button: Alternative action or dismiss option
- URL Types: Internal pages, external sites, deep links, app store links
🎯 Targeting Options
Platform Targeting
- 📱 iOS: Target iPhone and iPad users
- 🤖 Android: Target Android device users
- 🌐 Web: Target web browser users
Audience Segments
- 👥 Custom Segments: Groups you've created based on behavior
- 🌍 Geographic: Target by location
- 📊 Behavioral: New users, returning users, active users
- 💳 Subscription: Free users vs premium subscribers
Preview & Testing
👀 Preview Features
The preview panel shows exactly how your message will appear to users:
- 📱 Mobile Device Mockup: Realistic phone interface
- ⚡ Live Updates: Changes reflect immediately as you edit
- ❌ Close Button: Shows the "X" button users will see
- 🔘 Button Styling: Displays actual button appearance
🧪 Testing Strategy
Before Publishing
- 📝 Content Review: Check spelling, grammar, and messaging
- 👁️ Visual Check: Ensure image quality and text readability
- 🔗 Link Testing: Verify all URLs work correctly
- 📱 Mobile Preview: Confirm it looks good on mobile devices
Small Audience Testing
- 👥 Create Test Segment: Include yourself and team members
- ⏰ Short Duration: Set brief time windows for testing
- 👀 Monitor Display: Check if messages appear correctly
- 🖱️ Test Interactions: Verify button clicks and navigation
Publishing
✅ Final Review Checklist
Pro Tip: Go through this checklist before publishing to ensure your message is ready for your audience.
Basic Setup:
- 📋 Campaign name is descriptive and clear
- 📅 Start/end dates are set correctly
- 🌍 Timezone is appropriate for your audience
Content:
- 📋 Title is compelling and under 50 characters
- 📄 Description uses proper formatting
- 🖼️ Background image is high quality and relevant
Configuration:
- 🔘 Primary button has clear action-oriented text
- 🔗 Action URL is working and leads to correct destination
- ⏰ Trigger is set to appropriate user behavior
- 👥 Audience is selected (required)
- 📱 Preview looks good on mobile device
🚀 Publishing Steps
- ✅ Review Configuration: Go through the checklist above
- 📤 Submit Campaign: Click the "Submit" button
- ✅ Confirmation: You'll receive confirmation that your campaign is active
- 👀 Monitor: Watch for any issues in the first few hours
- 🔧 Adjust: Make changes if needed (you can edit active campaigns)
📊 Post-Publishing
Monitoring Your Campaign
- 👀 Check that messages are appearing for your target audience
- 💬 Monitor user feedback and support tickets
- 📈 Track any changes in user behavior
- 🔧 Be ready to pause or modify if issues arise
Optimization
- 🧪 A/B test different variations
- ⏰ Adjust timing based on user behavior
- 🎯 Refine targeting based on performance
- 📅 Update content for seasonal relevance
🎉 You're Ready to Create!
💡 Pro Tip: Always start with a small test audience before launching to your full user base. This helps you catch any issues and optimize your message before reaching all users.
🚀 Ready to create your first campaign? Follow these steps and you'll be engaging your audience with targeted in-app messages in no time!