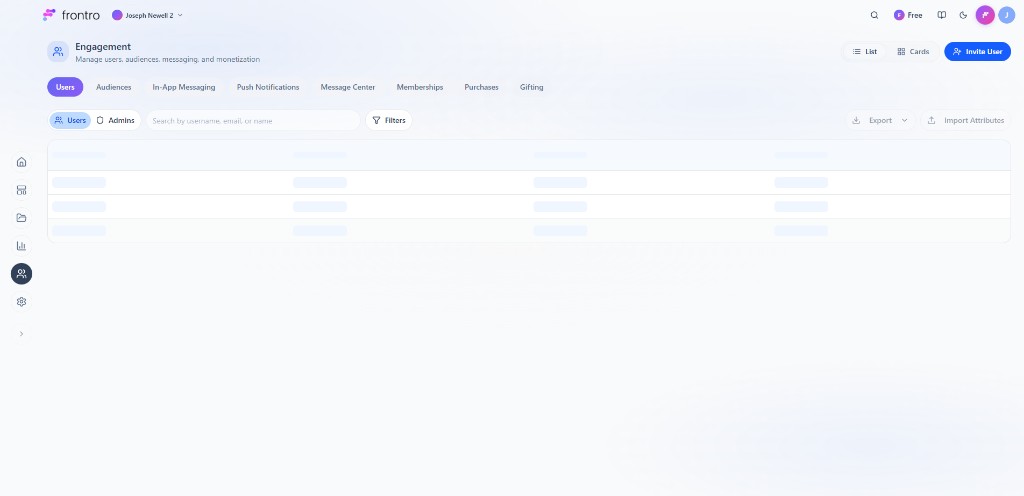
Users
Manage all users and admins on your channel from the Users tab in Engagement. View user details, invite new users, export data, and take actions like resetting passwords or blocking accounts.
Where to find it
In the left navigation, open Engagement. The Users tab is the first tab across the top (alongside Audiences, In-App Messaging, Push Notifications, Message Center, Memberships, Purchases, and Gifting). Use the Users / Admins sub-tabs to switch between all users and admin accounts. The top-right has List / Cards view toggle and + Invite User.
Users tab
The Users sub-tab lists all registered users on your channel. Use Search by username, email, or name and Filters to find specific users. Export downloads your user list, and Import Attributes lets you bulk-update user data.
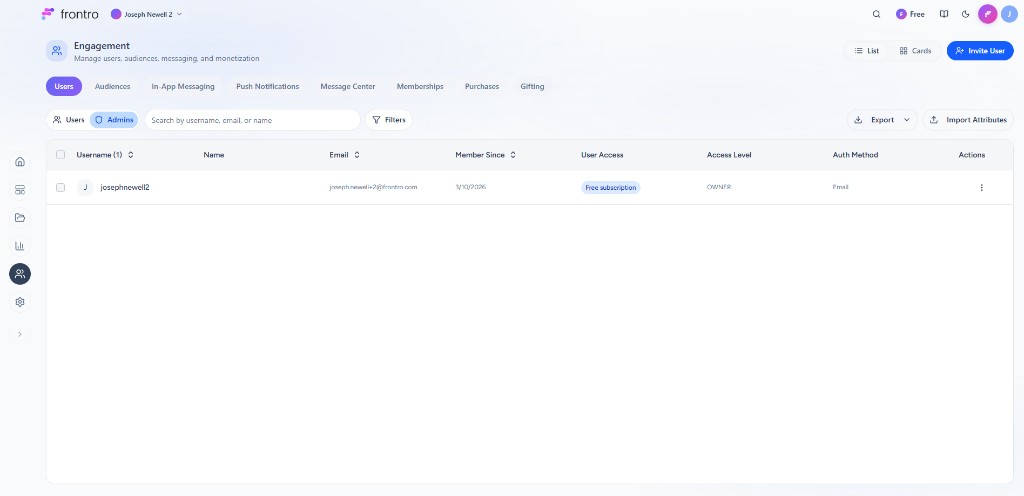
The user table shows online/offline indicators and a Last Active date so you can see who is active on the channel and when they were last seen. Columns include:
| Column | What it shows |
|---|---|
| Username | The user's handle |
| Name | Display name or full name |
| Registered email address | |
| Member Since | Date the user joined |
| Last Active | When the user was last active |
| User Access | Current subscription or access level (e.g. Free subscription) |
| Access Level | Role such as OWNER, ADMIN, or member |
| Auth Method | How the user signed in (Email, Google, Apple) |
| Actions | Per-user action menu (see below) |
User actions
Click the three-dot menu (Actions column) on any user row to see available actions.
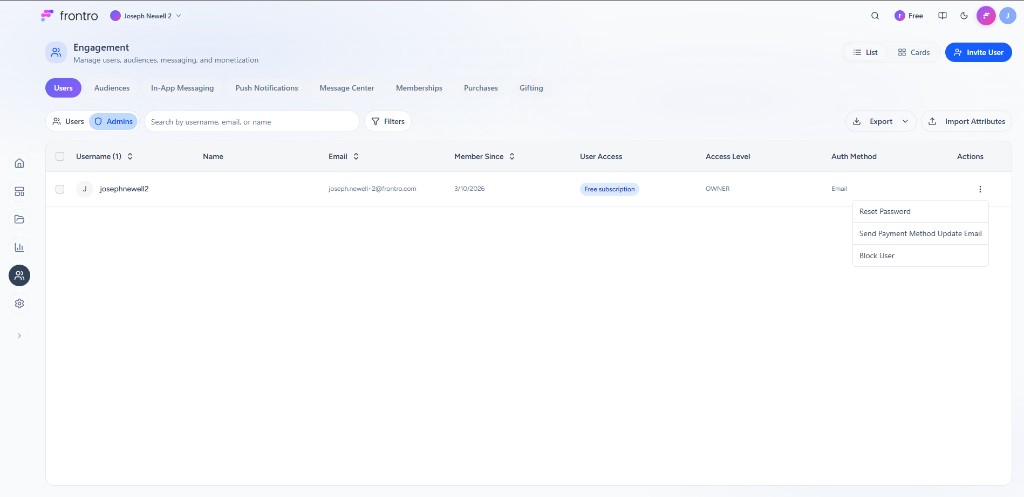
- Reset Password — Send a password reset email to the user.
- Send Payment Method Update Email — Prompt the user to update their payment method.
- Block User — Block the user from accessing the channel. Blocked users can't post comments, chat, or interact.
Admins tab
The Admins sub-tab filters the list to show only users with admin-level access (OWNER, ADMIN, etc.). The same table columns and actions apply. Use this tab to quickly review who has elevated permissions on your channel.
Inviting users
Click + Invite User (top-right) to open the Invite New User modal.
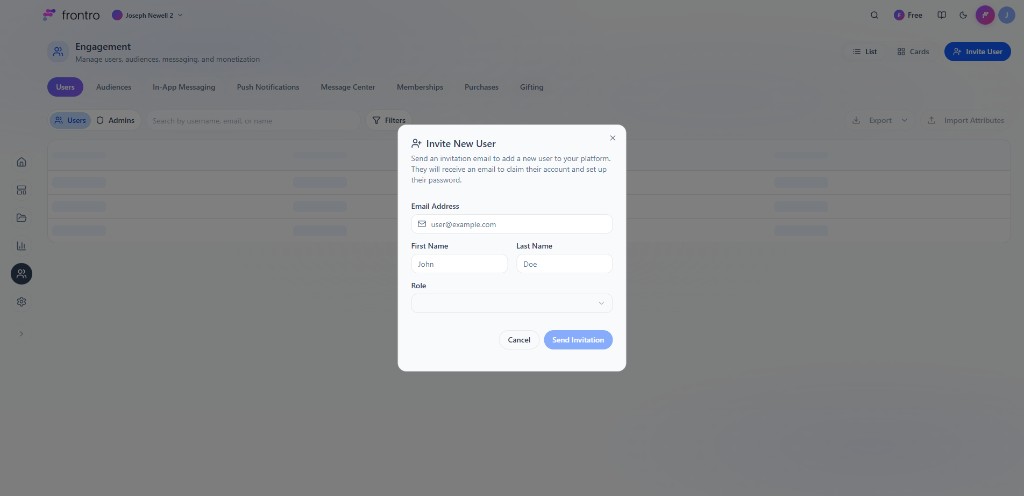
- Email Address — Required. The email where the invitation will be sent.
- First Name and Last Name — Pre-fill the user's name.
- Role — Choose the role for the invited user (dropdown).
- Click Send Invitation to send. The user receives an email to claim their account and set up a password.
User profiles
Click a user row to open their profile. The header shows the user's username, account status, email (with a verified badge when confirmed), role (e.g. OWNER), and Member Since. The Profile tab is an overview of account, personal, subscription, and activity details, plus Stripe billing tools and transaction history.
Profile tab
The profile view is organized into sections you can scan top to bottom:
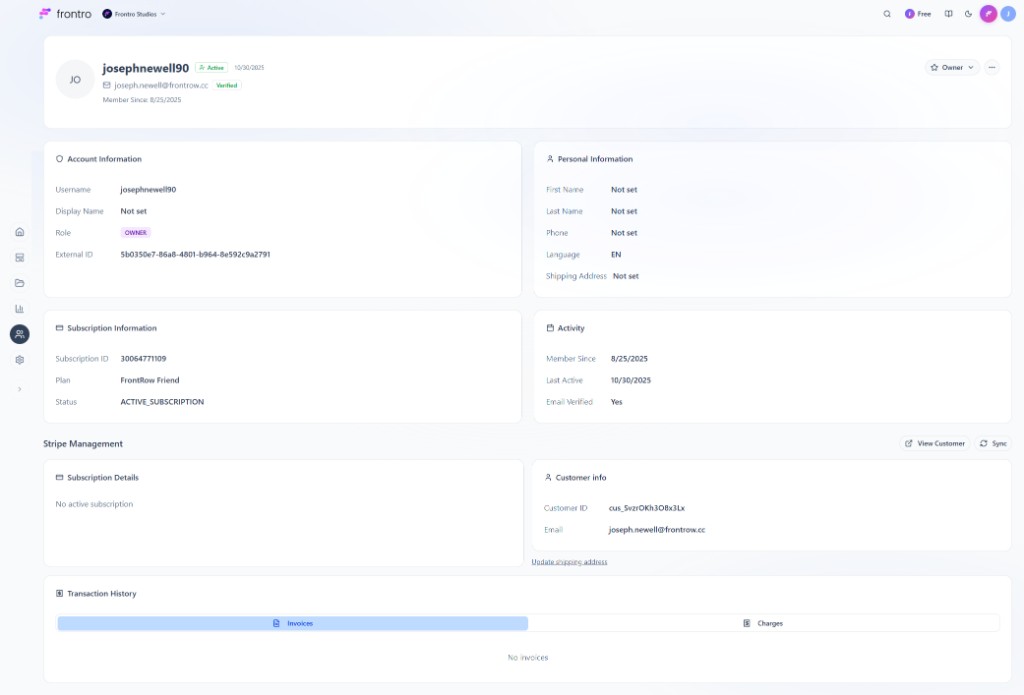
Summary (top) — Initials or avatar, username, status (e.g. Active) with date, email with verification state, member-since date, role badge, and actions (e.g. owner options and overflow menu).
Account information — Username, display name, Role (badge), and external identifiers used by integrations.
Personal information — First name, last name, phone, shipping address, and Language (e.g. EN).
Subscription information — Subscription ID, plan name, and subscription status.
Activity — Member Since, Last Active, and whether Email is verified.
Stripe management — Customer and subscription context for billing: open the customer in Stripe, sync data, review subscription status, and see Customer ID, email, and links such as updating shipping address when applicable.
Transaction history — Tabs for Invoices and Charges to review billing history for that user.
| Field | Description |
|---|---|
| Registered email with verification status | |
| Display Name | Public-facing name |
| First Name | First name |
| Last Name | Last name |
| Phone | Phone number |
| Language | Preferred language (e.g. EN) |
| Last Active | When the user was last active (also in the user list) |
Security tab
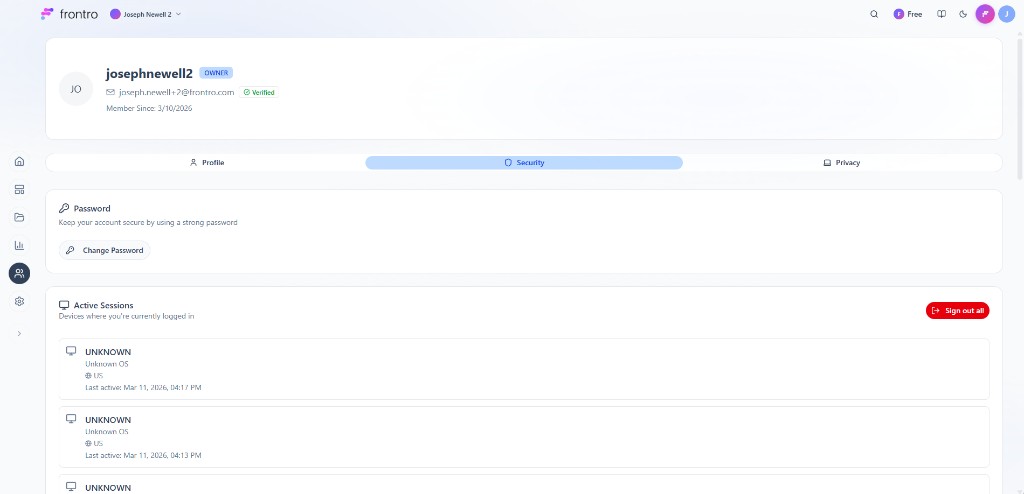
- Password — Change Password to update the user's password.
- Active Sessions — Lists devices where the user is currently logged in, showing device name, OS, location, and last active time. Use Sign out all to terminate all sessions.
Privacy tab
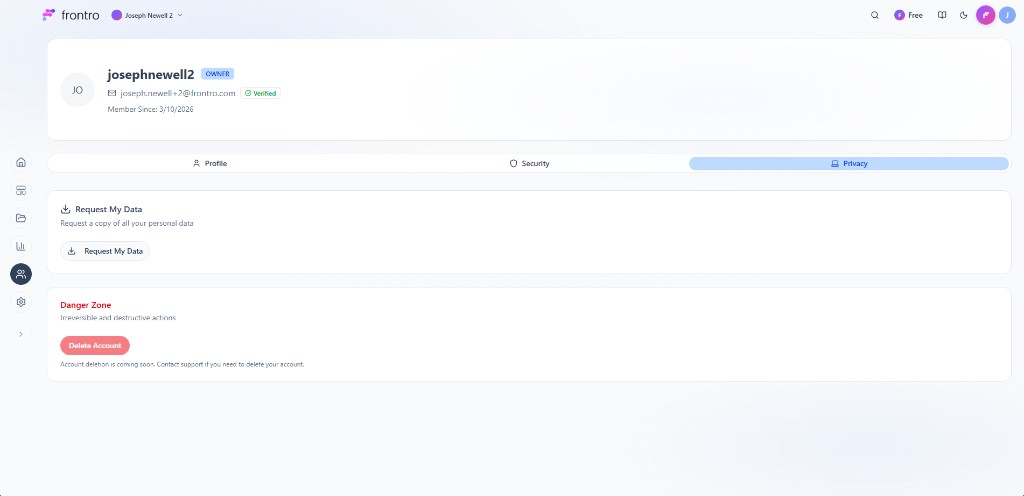
- Request My Data — The user can request a copy of all their personal data.
- Danger Zone — Delete Account to permanently delete the account. Account deletion is coming soon; contact support if needed.
FAQ
How do I make someone an admin? Invite them with an admin role, or change their role from their user profile or actions menu.
Can I export my user list? Yes. On the Users tab, click Export to download user data.
What does blocking a user do? Blocked users can't post comments, chat messages, or interact with the community. Blocking doesn't revoke access to viewing content in most cases.
Can users delete their own accounts? Account self-deletion is coming soon. For now, users should contact support.
Related documentation
- Audiences — Segment users into audiences
- Community Chat — Chat moderation and user blocking
- Moderation — Broader moderation tools
- Subscriptions — Membership tiers and access
- Authentication — Roles, permissions, and sign-in methods